Making butter is easy with a food processor, and it produces a light fresh taste. You will need:
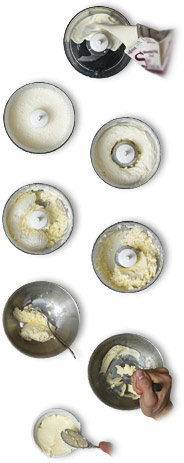 Stages of buttermaking in the food processor, and bowl. |
1-2 cups heavy whipping cream, or double cream (1/3 liter)
(preferably without carrageenan or other stabilizers)
Fit food processor with plastic blade, whisk, or normal chopping blade. Fill food processor about 1/4 - 1/2 full. Blend. The cream will go through the following stages: Sloshy, frothy, soft whipped cream, firm whipped cream, coarse whipped cream. Then, suddenly, the cream will seize, its smooth shape will collapse, and the whirring will change to sloshing. The butter is now fine grained bits of butter in buttermilk, and a few seconds later, a glob of yellowish butter will separate from milky buttermilk. Drain the buttermilk.
You can eat the butter now -- it has a light taste -- though it will store better if you wash and work it. Add 1/2 cup (100 mL) of ice-cold water, and blend further. Discard wash water and repeat until the wash water is clear. Now, work butter to remove suspended water. Either place damp butter into a cool bowl and knead with a potato masher or two forks; or put in large covered jar, and shake or tumble. Continue working, pouring out the water occasionally, until most of the water is removed. The butter is now ready. Put butter in a butter crock, ramekins, or roll in waxy freezer paper.
Yield: About half as much butter as the amount of cream you started with.
Various options:
- Salt to taste before working, a few pinches.
- Have the cream around 60°F/15°C before churning. (55°F/13°C for goat milk)
- Obtain the freshest cream you can. So-called "vat pasteurized cream" tastes better than ultra heat treated (UHT) or HTST pasteurized. Try calling your state Department of Agriculture, and asking the Milk Control office who sells vat pasteurized cream.
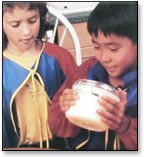 Shake in a jar instead of a food processor. Shake about once a second. Add a marble to speed things up. This is fun with kids, but expect it to take between 5-30 minutes, depending on the shaking.
- Culture the cream before churning. Add a few tablespoons (50 mL) store-bought cultured yogurt, buttermilk, sour cream, clabbered cream, or creme fraiche, and let sit about 12 hours at warm room temperature (75°F/24°C is ideal) to thicken and ferment before churning. It should taste delicious, slightly sour, with no aftertaste. If it is bubbly, or smells yeasty or gassy, discard.
- Use some butter making tools, such as a churn, paddle for working, or molds for forming the finished butter.